


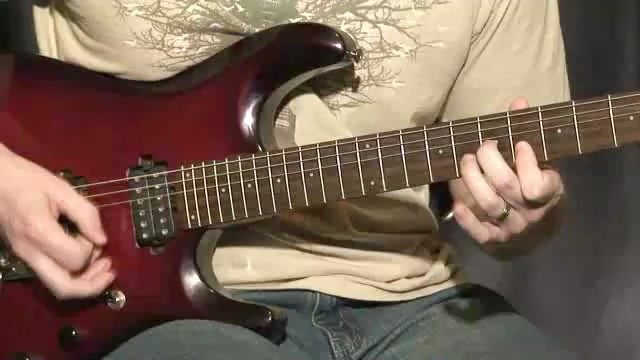


Now, I'm sure for a lot of guitar players in the 21st century, sweep picking is an essential that you need to have in order to be a successful guitar player and be able to express yourself more freely. Many guitar players, when first learning sweep picking, try to go automatically to 6 string sweeping because that is what they see all their idols do. There is nothing wrong with that, but if this is your first time sweep picking, we need to get down the essential movements so that you can execute those sweeps cleanly and efficiently.
In this tutorial, we are going to be taking these sweeps, one string at a time down the neck. We'll start off with 3 strings, then graduate to 4 strings, then 5 strings, and then finally 6 strings. And along the way we will be adding in different techniques and effects to expand your sweeping prowess.
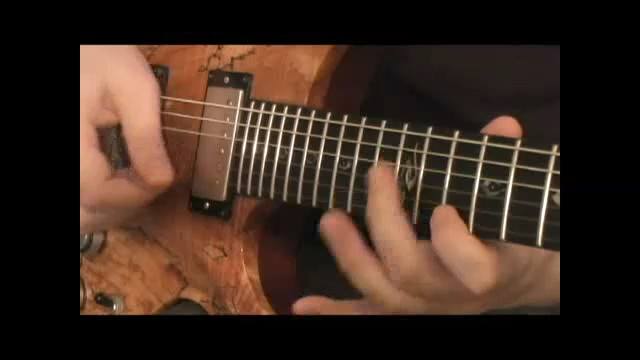
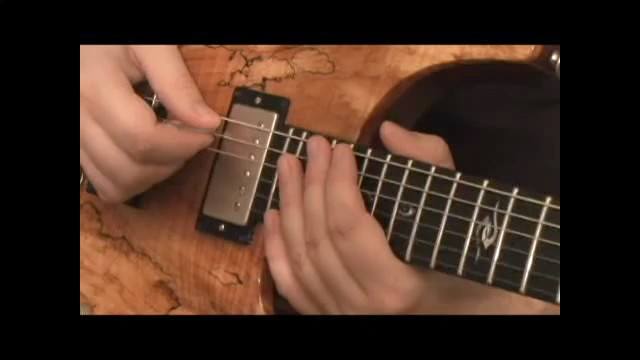
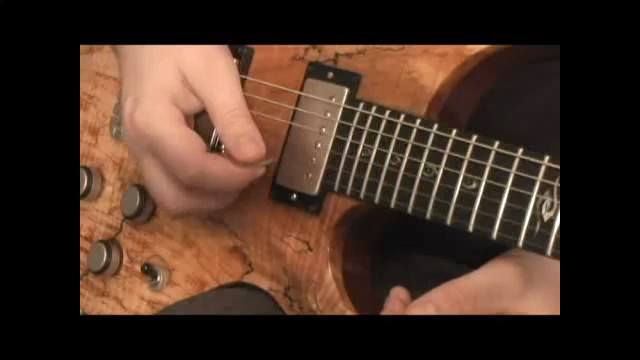
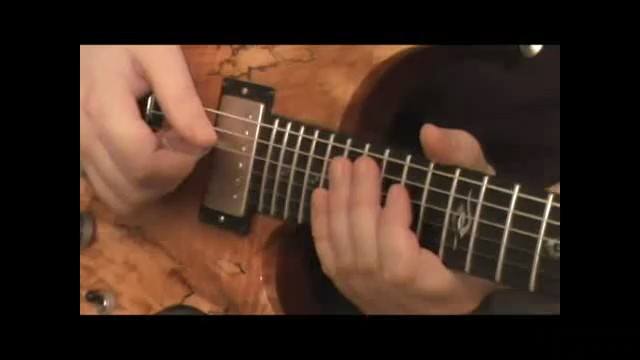
The first thing we need to get down is the basic picking movements of the right and left hands. When doing sweep picking, you're not going to be strumming all the notes like a chord, but instead you are going to let the pick fall down to each string in a "brushing" motion. Make sure that each note is struck cleanly and that you are leaning your pick slightly in the direction you are sweeping. For the left hand, make sure that you lift each finger slightly after the subsequent notes are played so that your left hand "rolls" across the strings.
The first 3 string patterns we will learn are just basic major and minor triads on the G, B and high E strings. The first triad we are going to learn is a major second inversion sweep.
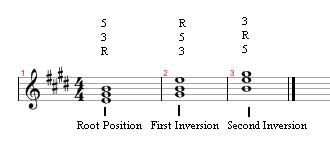
You may be wondering "what is an inversion?" Well, there are 3 classifications of inversions: Root Position, First Inversion, and Second Inversion. Root position is a triad built as: Root, Third, Fifth. First Inversion is when we take the root and put it an octave higher so that the 3rd of the chord is now in the bass, which would go: Third, Fifth, Root. Second Inversion is when we move the third an octave higher so that the 5th is in the bass, which would go: Fifth, Root, Third.
So with that, we can now learn our first second inversion sweeping pattern, which goes like this: 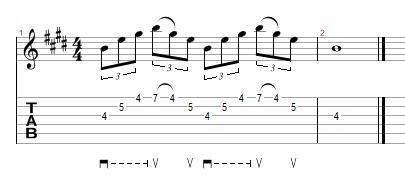
Make note that when practicing this sweeping pattern, that you set your metronome to a comfortable tempo, around 60 bpm. This is not a race. You're just trying to get the basic movements down first. Make sure that each note rings out cleanly and that you aren't muffling any of the notes. Also, make sure you are lifting your finger slightly after you play a note so that you don't get any unwanted noise. And make sure that after playing a note and lifting your finger, mute the string ever so slightly with your right hand along the bridge so that the open string doesn't ring out. And note that when playing this, that you are pulling off from the 7th fret to the 4th fret and that isn't picked.
Once you have that under your fingers, practice this sweeping exercise, keeping in mind the points I made before. 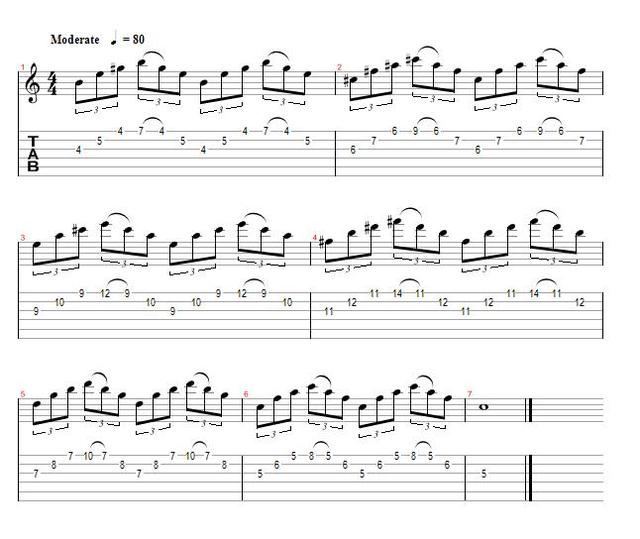
The next major sweeping pattern is going to be the root position sweep, which goes like this: 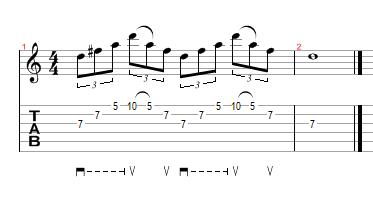
The tricky part comes about in the beginning with the 2 notes played on the 7th fret on the G and B strings one after another. After playing the root, roll your left wrist slightly so that the bony part of your first knuckle is playing the 3rd on the 7th fret of the B string while slightly keeping the tip of your finger on the G string to make sure that note doesn't ring out.
Once that is down, play this exercise which will combine the 2 sweeping patterns we learned earlier. 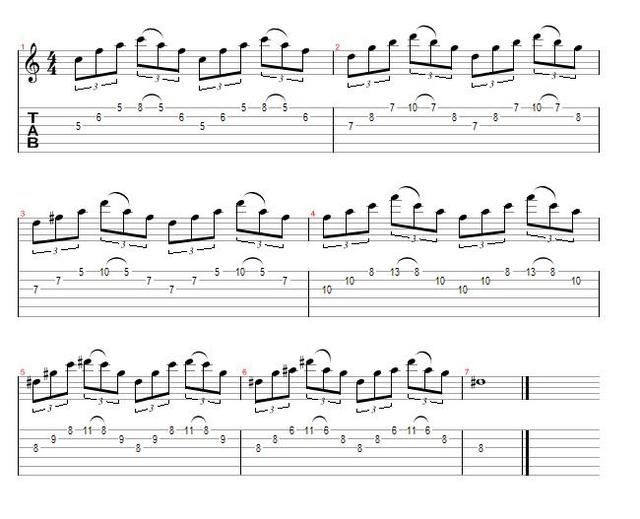
The last major triad pattern we will learn is a first inversion sweeping pattern, which is shown here: 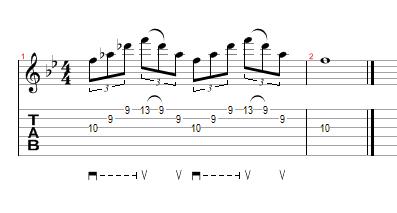
This pattern also has 2 notes played across the same fret, so use the same technique of playing this like we learned in the previous example.
For this next exercise, we will be combining the 3 major triad shapes we learned, and this will also show you how to connect them across the fretboard so that each inversion sweep will flow into each other for a nice effect. 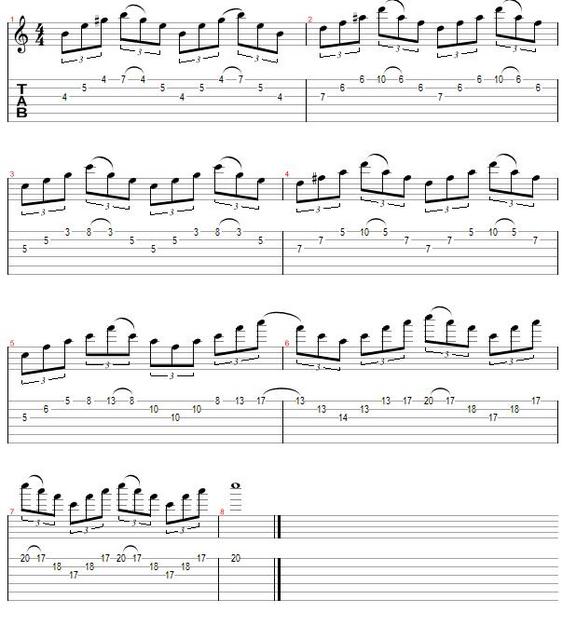
(Note: I did not indicate this on the tab, but when switching inversions, slide up from the 8th fret to the 13th fret, from the 13th to the 17th fret and from the 17th to the 20th fret with your pinky. In the next installment, we will be going over the different minor triads and their inversions.